
"provide a good entry point to FPV-flying with goggles"
So you want to start flying FPV, but you don't want to buy an external monitor? You go looking for affordable goggles' instead and find out that the cheapest ones start at a couple of hundred dollars, but you don't have the budget for them and you don't necessarily need something so premium. Just something to get you started and see if you want to buy better one later. Well these DIY goggles offer a very good and affordable entry point to the experience. Here are my opinion on the glasses.
Technically not being really glasses, but neatly packaged small LCD screen into an EPO-enclosure with a head strap. it's quite easy to see and feel why these are not very expensive, but for the price you pay you get surprisingly lot. And you won't feel bad if you drop this accidentally, because it will survive the fall.

Above is shown the main parts you get in the package. LCD screen, top and bottom half of the enclosure, some foam pads (already attached), a lens holder (assembled) and a elastic head strap. Assembling all the parts will take a maximum of 15 minutes, unless you need to wait for glue to dry. I personally use tape to hold everything together.

The LCD screen won't win any awards for it's quality, but it doesn't go into a "blue screen" and with a panel size of 11 cm or 4,4 in placed ~10 centimeters away from your eyes, gives a nice field of view compared to an external monitor.

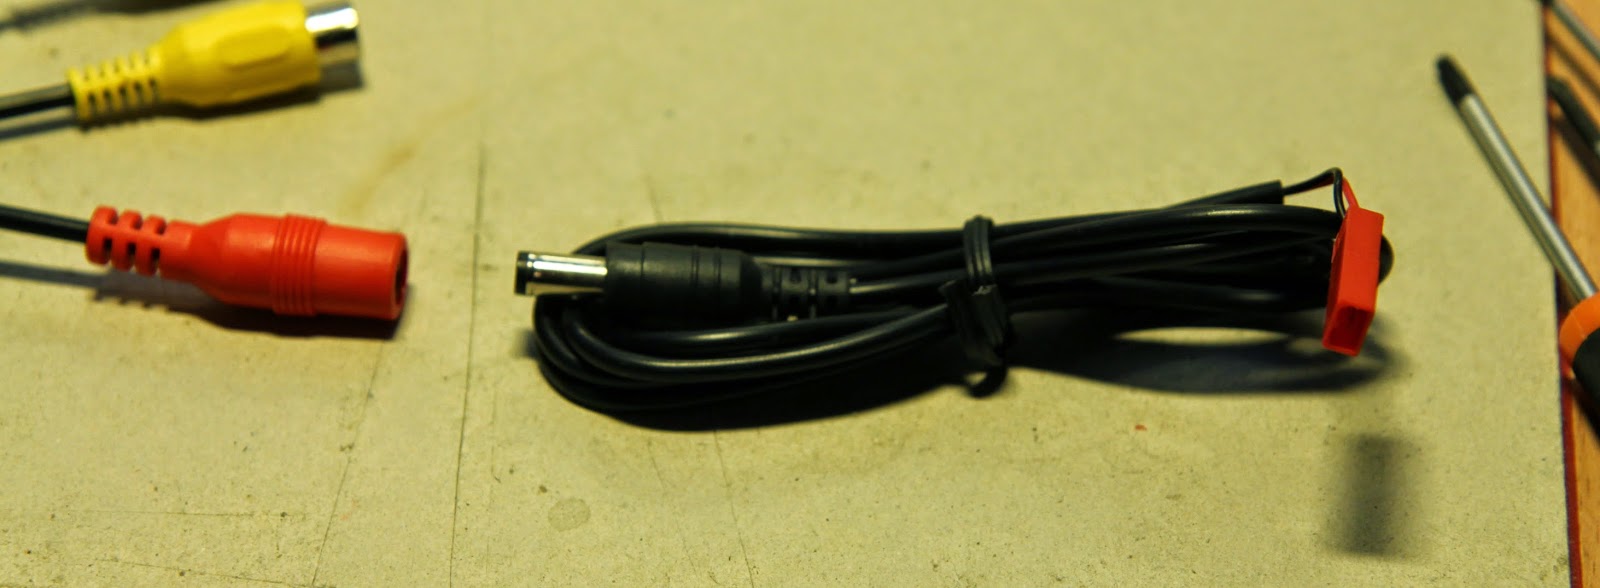
It has RCA jacks for both composite video and audio, but it doesn't have speakers so... no idea why that's there. 12 Volt power, is supplied via a DC plug and comes with a JST connector cable so you can use a Li-Po battery to power it.

On the back are 3 buttons, which are used to navigate the menus. You can change brightness, contrast, color (saturation), aspect ratio (4:3 and 16:9), language and reset back to factory defaults.

As an interesting detail when taking the back plate off of the screen to look at the circuitry, which consisted mostly of power supply components, a couple buttons and the LCD driver. I Discovered a "24 V" silkmask marking on the +Vcc pad and measuring the two regulators for 3,3 volts and 1,2 volts along side a small switching mode 5 volt supply with the coils and caps. Meaning that you have a very wide input voltage range from 7-24 Volts, so you can also use any Li-Po from 2-5 cells to power this.

Next part is the lenses and the lens holder. The holder rectangle itself is cut from glass fiber along with 2 little tabs, which go to it's sides, I personally glued mine to it. The lenses come in 3 different zoom strengths and you'll want to test, which one is the best for you. I personally found the smallest zoom lens the best and taped it onto the lens holder (tapes on the backside on the picture above).

No lens and the picture is nice and crisp, but won't fill your field of view so well. Other thing that I have noticed is that because the screen is quite close for your eyes to focus, it really strained my eyes and I could feel the start of a headache.

With the lens in place the picture is brought closer (not well illustrated above), so it'll give wider field of view. As a plus with the lens I didn't feel like it was straining my eyes, so no headaches, which is good. Personally I have it setup so that the screen edges touch the sides of the lens when I have the goggles on.

I like how simple the lens' adjustment is. You get little foam rubber pads, which you glue or tape on to the top and bottom halves of the enclosure and when you put them together the foam pushes down enough to hold the lens frame in place and you can adjust it by moving the outward sticking tabs closer or further from your face. Simple!

Ergonomically, how does it feel on your face out of the box? It's not a perfect fit, it's good, but not perfect. The only part I would like to cut and shape a little is the nose notch, it's a bit too small. It crunches the tip of my nose when I have the goggles on so that the screen is at a nice position for my eyes, so I don't need look upwards. A little extra notch should fix it.

Also included in the package are couple of thin, long and firm foam pads, which are meant to be put on the business end to give a little padding against your face. Weight itself shouldn't produce problems, but given that the screen is right at the other end, it might start straining your neck muscles during prolonged use, if you keep it parallel to the ground.
END STATEMENT
Ratings from 1 to 10
Price/Quality : 8 (30 $)
Ergonomics : 6 ; 8 after making it fit your face properly
Usability : 6
As a summary it's an affordable entry point into the FPV-scene. For the price it's really good bang for your buck, but as a DIY kit it needs some touches from the user/owner to make it work the best. Ergonomically it's good. You get very good shielding from sunlight and it'll fit your face well after you have done a little modding. Usability wise it's also very good, with simple setup and menus, but It could have had another video input so you could perhaps connect it to a laptop or cellphone's mini-hdmi. All in all, good and affordable package!
No comments:
Post a Comment